Showing posts with label baby quilts. Show all posts

Saturday, 25 October 2025

Swan Lake Surprise


One time when I took a road trip (I can' t remember why) I decided to stop in at my last work site on my way home. I had a great visit with my former colleagues, and discovered that one of them (the one who took my position) was pregnant with her third child. As I was off on mental health leave when she had her first two (was I really off work that long? Or maybe she had been on her first maternity leave when I went on mental health leave). Anyway, I had not given her anything for either of her other children, but I determined to give her a quilt for the third one.
That visit happened before my vacation to Ontario, and then there was the fair and getting projects finished for it, so I was kept busy with other projects. I was rather hoping that she would have a boy as I still have Work Zone and Blast Off that haven't found recipients yet. But in case she didn't, I decided to start working on a gender neutral quilt. More about that one in another post. 
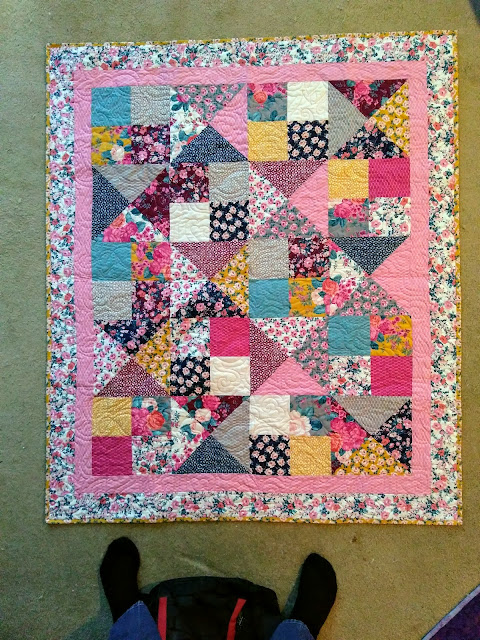
However, as her due date neared, I decided I might as well wait and see what the baby's gender was. I still had the rest of the Lily's Pond layer cake that I used for La Petite Princesse, plus more backing fabric in that line, that I could use for a girl's quilt, if necessary. And, as it turned out, she did have a girl.
However, I decided that I didn't really want to use the Quick and Easy Baby Quilt idea again. I didn't want it to be too similar to La Petite Princesse, and might have used a different background fabric like a bright pink, if I had it, but my only other background option was black - definitely not for a baby girl! I pondered different options, rummaged in my stash a little, and finally decided to do another Baby Alter Ego.
Bad choice! When I put the blocks up on my design wall, I didn't like it at all. The fabric in this line is all so pale that there wasn't enough contrast to give it any visual interest. It looked washed out and boring. And I didn't know what to do to make it better. 
There is some brown in this fabric collection, and I did have some dark brown solid in my stash. It wasn't a perfect match and I was afraid that it might overwhelm the pale colours. So, I decided to experiment with some narrow sashing between the blocks. And I liked it!. So I sashed the whole quilt top, and added a pale pink solid border. And in case you're wondering why I didn't use the pale pink as contrast/background with the Lily's Pond layer cake, I felt that it was just too pale and the whole quilt would look washed out. But it looks great in the border. I don't know if I've mentioned it before, but I often find myself singing something that, however loosely, coordinates with what I'm working on. So this time it was "Swans on the Lake". If you've ever used the John Thompson Grade 1 piano book, then you might remember it. You can find the words here
On to the quilting design. Depression and anxiety can make one very indecisive, and I have been finding that I am often challenged when it comes to picking a quilt design for the quilt. When I first purchased the fabric, I also purchased a pantograph called Pond Lily to go with it. Unfortunately, Lily's Pond - the fabric - features swans, whereas Pond Lily - the pantograph - features frogs. I chose not to use Pond Lily when I made La Petite Princesse, choosing Crowns-n-Diamonds instead to go with the princess theme and the fact that some of the swans were wearing crowns. But I didn't want to use that one again. As I've mentioned previously, I'm trying to go through my stash of pantographs and use every one at least once. But which one to use? I considered several and, on Facebook, jokingly suggested quilting spiders on a little girl's quilt. And then I thought, why not frogs? It's funny and cute and a little surprising. And the pantograph does feature lilies as well, as does the fabric. Besides, there once was a frog that turned into a handsome prince (although not in the same fairy tale as the swan). So that's what I did. And then the song going through my head was, "Frog, He Would a-Wooing Go".

Not everything has to be exactly as we expect. And hence why I called the quilt, "Swan Lake Surprise". I haven't shared a link to the pantograph because it was a Willow Leaf pantograph. While Urban Elementz does have one by the same name and by the same designer, the design has been changed and I like mine better.
Meanwhile, I played batting chicken when I short-changed myself in cutting the batting. 
I'm not sure how that happened, but thank God, I won. 
I also decided to do a vertical seam on the backing. Directional prints can be challenging when making a quilt backing, because they're usually running in the wrong direction. Sometimes, like with La Petite Princesse, I don't let it bother me and just make the quilt with the print running sideways. But this time, I decided against it, which meant I had to piece the backing differently, having to use smaller pieces at the bottom to make all of the print run in the correct direction. And since I've had the fabric in my stash for several years, not to mention the fact that the new Craftsy no longer sells fabric, it's not like I could buy any more. 
But it's done, and thank the Lord, it arrived at it's destination shortly before the latest postal strike started. 
I thank God that He inspired me with the idea of the brown sashing. In my opinion, it vastly improved what would have otherwise been an incredibly blah quilt. You may not agree with me, but I believe God is the original author of all good ideas. And that brings to mind one of my favourite Bible verses. 

"For I know the plans I have for you,” declares the Lord, “plans to prosper you and not to harm you, plans to give you hope and a future."
Jeremiah 29:11 NIV
GOD'S PLANS ARE ALWAYS BEST
I'm not talking about quilts here. Whether I had gone with the brown sashing or some other idea is really insignificant in the eternal scheme of things. But He does have a plan for each one of our lives. And His plans are always best. We may think we know best, and things may appear to be going better when following our own plans. But ultimately, if our plans do not agree with HIs, we will eventually meet with loss by following our own ideas, if not in this life, then in eternity. 
However, I will admit that it isn't always easy to discover God's plan for us. While He is trying to teach us valuable lessons, we are often too impatient to wait and proceed without His guidance. And then what? When we find ourselves down the "wrong road", is there any hope?
GOD ALWAYS HAS A PLAN 'B'
It's been my experience that even when I take a wrong turn, God is still patiently waiting for me to ask for His help. He may have to take me through an unpleasant detour because I've gotten so far off the track, but He can and will get me back, as long as I am willing to continue to follow Him. The verses following the one quoted above have this to say: 
"Then you will call on Me and come and pray to Me, and I will listen to you. You will seek Me and find Me when you seek Me with all your heart. I will be found by you,” declares the Lord, “and will bring you back..."
Jeremiah 29:12-14a NIV
Never fear to return to Him, even when you think you are too far gone. As the apostle Paul said, 
This is a faithful saying, and worthy of all acceptation, that Christ Jesus came into the world to save sinners; of whom I am chief.
1 Timothy 1:15 KJV


Friday, 31 December 2021

Finishing Up a Year of Crafts

I took some vacation time and am off work this week and I'm really glad I am. We're in the middle of a severe cold spell, with the temperature going down to the -40s Monday night and Tuesday (and even colder with the wind chill factor). Very happy to not have to commute to work in that kind of cold. I've been mostly just hunkering down at home, catching up on some crafting. Initially, my goals were a little different, but then I switched to alternate WIPs/UFOs to complete. 

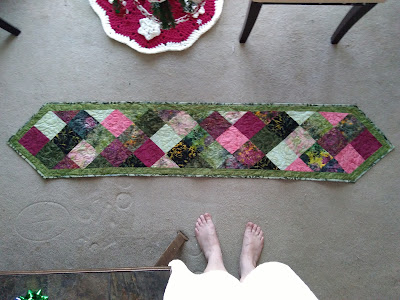
I started this table runner fairly early in my renewed quilting journey (2013-ish), 

but other projects took priority and it sat as just a top for several years. Earlier this year, I finally took it out again and quilted it on the longarm. Then, because it still wasn't a priority, and because I don't really like binding, it sat again. I finally bound it this week and put it on my dining room table. 
The next binding project was Baby Alter Ego II.

You may remember my other Baby Alter Ego. I actually started this one first and planned it for a baby girl, but again it got put on the back burner and disappeared for a few years during and post renovations to my studio. Meanwhile, I needed a boy's quilt and made the other one and gifted it. This one finally resurfaced and eventually I decided I needed to finish it. The borders were completed and it was quilted,  but joined the binding pile because I didn't have a recipient for it in mind. 
My goal is actually to assemble a small stash of baby quilts so that I will be somewhat prepared should my friends experience a baby boom again (was it 5 or 6 baby quilts that I completed in a year?). The next one for binding was Blast Off.

I made the quilt top earlier this year and had quilted it. But the binding is finally on and both Blast Off and Baby Alter Ego II joined Work Zone in my stash of baby quilts. 
I completed Work Zone earlier in the year, but I never got around to blogging about it. I think I might have mentioned before that I decided that I really don't like Baby Alter Ego. It's just too scrappy for my tastes, with no real rhythm to it. Both Work Zone and Blast Off are variations of my Quick and Easy Baby Quilt, and even though they are scrappy, also being made from layer cakes, they don't just look like fabric vomit, and I much prefer them over Baby Alter Ego. 
Now, before introducing the next project, I'm going to digress slightly to comment on pre-cuts. I might have mentioned this previously, but I have come to the conclusion that I'm really not that fond of pre-cuts. First of all, they're not cheap. Charm packs are $18, layer cakes and jelly rolls are $65, and fat quarters are running at least $5 each (all prices Canadian). The second point is that they are really not all that convenient. Pre-cuts, to me, are only really convenient if you are actually going to use that size and shape. Jelly rolls are probably the most convenient because you often use the full width and length, but having to cut down 10" squares to 9-1/2" (or whatever) is really not convenient. Or chopping up a fat quarter to use in a quilt, leaving huge scraps. Plus, what am I going to do with that 1/2" strip of fabric? Or those odd shaped scraps from a fat quarter. It's just going to waste. And I hate wasting fabric. And I've done enough pre-cut patterns now to know that using yardage for a lot of these patterns would be a lot more convenient and less wasteful. Yes, my Quick and Easy Baby Quilt is a good use of layer cakes, but most patterns for pre-cuts are not like that. I personally cut my fabric to size and seldom trim my blocks. They might not be perfect, but they're good enough. I'm not entering my quilts in a juried quilt show. So, I really don't choose to waste my time and fabric trimming down pre-cuts. I will share a couple of examples from my experience. Moonstruck was one which used 6" pre-cut strips. I don't even think those are available any more, and probably because they were so totally useless. I don't know if there was even a single pattern in the book that utilized the entire width of the strip. The second example is Exploring Space, where I ended up trimming 168 HSTs for one baby quilt! As I stated in that post, "I think I would have been much better off starting with the exact size squares I needed to make the Easy 8 HSTs and not have to trim each individual one. So, using a layer cake was kind of pointless. And that made this quilt tedious instead of quick and fun." Now I'd like to point out that my local quilt shop cuts up overstock, old stock, whatever, into metres and half-metres. And that is a pre-cut that I really do find useful. They sell the metres for $8 each and the half-metres for $4 each. And that's a price I can really get excited about because quilting fabric currently averages at least $20/metre. A half-metre of fabric for less than a fat quarter! And I have put many metres and half-metres to good use. Where the Charming Roses Bloom, for example, was made up mostly from these pre-cut metres. So, that brings me back to the next quilt. When I saw this MSQC tutorial, 
featuring 3-yard quilts, it got my attention. I could easily pick up 3 metres of fabric that would look good together from the pre-cut metres at my local quilt shop. And that's what I did. 
This is Plum Perfect, made from pre-cut metres from my local quilt shop. I had to alternate fabrics for the binding because there was not enough of one fabric left to do a full double fold binding. And, of course, I had to add backing and batting, and voilà, a quilt big enough for a small throw/lap/baby quilt, about 43" x 60". And over all, a much more coordinated look than the ones above made with layer cakes. Leah's Ladder, which you can see in this post, is also a 3-yard quilt, made with pre-cut metres from my LQS. I think I'm hooked and I want to get all of the 3-yard quilt books by Donna Robertson.
Anyway, I had the quilt top done for Plum Perfect earlier this year. The backing fabric was purchased, but that's as far as I got. Until this week. I stitched the backing together, and quilted and bound it. And I have one more quilt for my baby quilt stash. I think that's enough baby quilts for now and hopefully, I'll be ready for the next baby boom. 
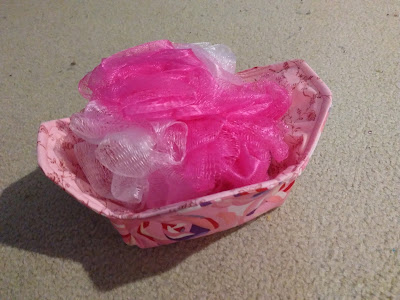
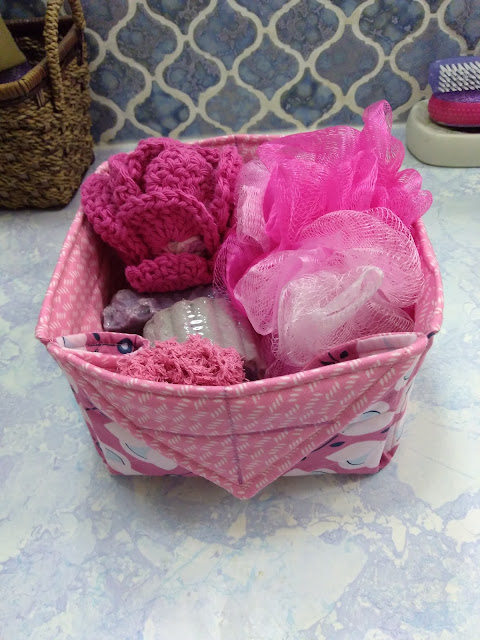
And that's it for quilt finishes for 2021. I have, however been playing around with gift baskets. One of my friends suggested that the bowl cozy would make a good gift basket. So I made one up, using some fusible interfacing and regular batting instead of Wrap'n'Zap, and the fabric is leftovers from a layer cake. 
Yes, actually, it would make a nice gift basket, just not for this oversized bath pouf if I wanted to include anything else. I wanted to make a gift basket for my niece and include a floral facecloth and an exfoliating scrubby
And so this basket worked much better. 
Because I wanted to use some leftover backing fabric from Plum Perfect, and it was only 16" wide, I used 16" squares of fabric instead of 18", and made the darts 3", and it turned out a great size. I still want to squish a couple more items in there. It's just been too cold to go to the store to buy them. 
Did you notice how I've rolled up the facecloth to look like a flower. You can do that with just about any size or shape of facecloth/dishcloth if you squish it together right and stuff it in a cup or mug: square, 
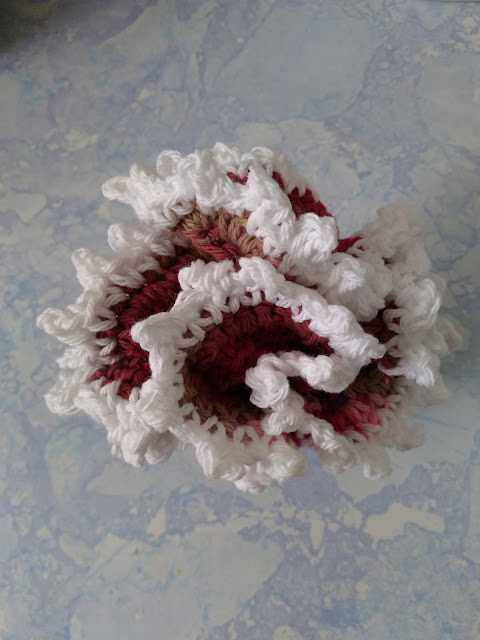
or even heart-shaped. 
I have a super abundance of cotton yarn, much of it left over from the Circles Throw. So I have been thinking of making spa/bath gift baskets for Valentine's Day. 
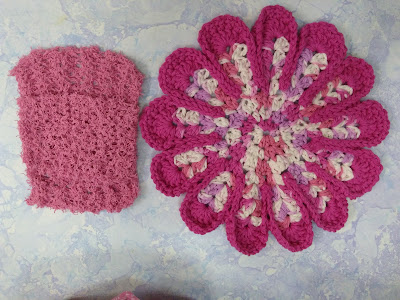
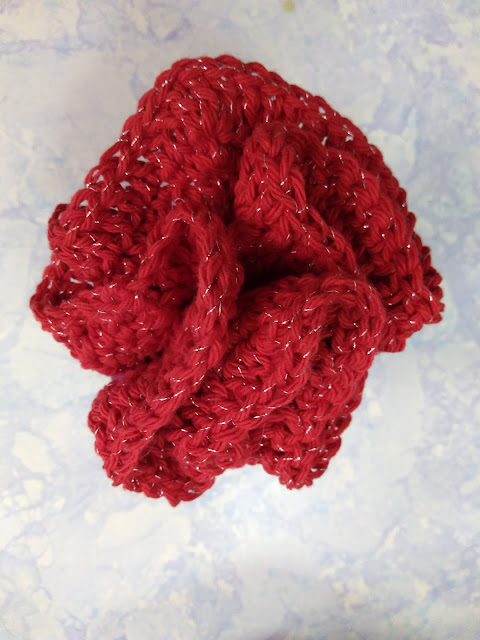
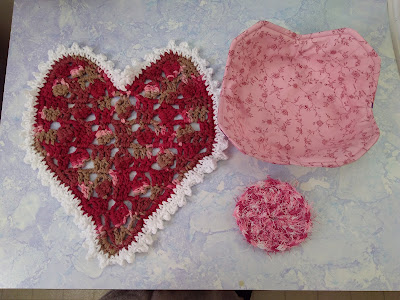
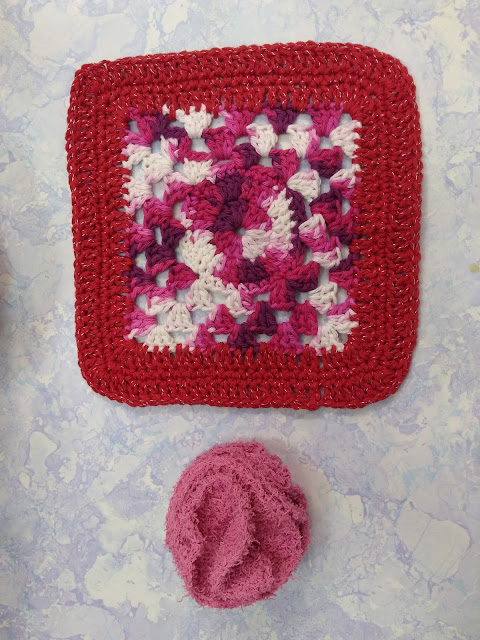
This heart-shaped washcloth (from A Year of Dishcloths, by Maggie Weldon) and exfoliator are a much better fit for the "bowl cozy" basket. By the way, it took me two hours to make that washcloth, as it did the bath pouf in this picture below. I think I'm going to look for a different heart-shaped washcloth pattern that will be less labour-intensive. 
I do not find Red Heart Scrubby yarn or any of its derivatives easy to work with, and from now on I will stick to using it to edge dishcloths and making the small exfoliators in the previous picture. 
I only had part of a small skein of the yarn I used in the washcloth, so finished it with Bernat Handicrafter Holidays Sparkle. I love bling, but I don't think including a yarn with metallic content in a washcloth was a good idea. Wash and exfoliate at the same time... 
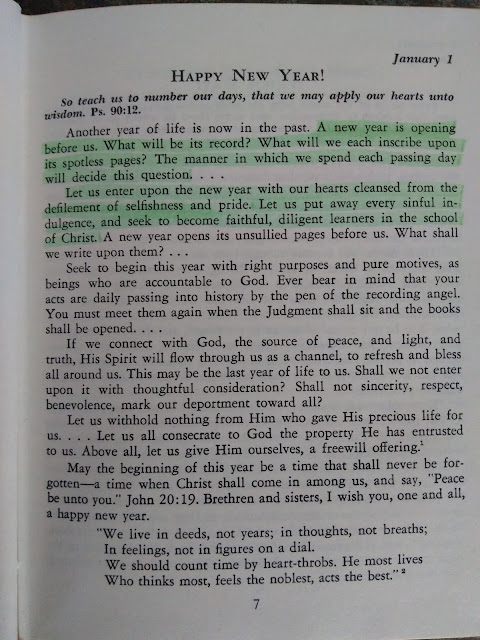
I guess that's it - those are my finishes for year end. It will be sundown soon and the Sabbath will commence - more important to me than New Year's Eve. So, I'm going to put my craft stuff away for now, and share with you a New Year's reading from a devotional book called Our High Calling by Ellen G. White. 


Monday, 12 October 2020

Too Many Projects on the Go

While working on Practice Makes Perfect, I decided to see if I had sufficient fabric left over to make the practice quilts for the two Angela Walters classes I own. One is Quilting With Rulers: Free Motion Made Simple, which I own online (hopefully, the new Craftsy will get our pre-owned classes sorted out soon). And the other is Help! How Do I Quilt It?: A Machine-Quilting Manual, which I own on DVD. Like the previous class, these are both taught mostly on a domestic machine, so I will have to be creative to make them work on my longarm. But, after all of the time and effort I invested in Practice Makes Perfect, I really am not in a hurry to do another quilt using free motion or rulers. I just wanted to get the quilt tops done so that they'd be ready when I am. And I can put the remnants of the fabric in the scrap bin. 

This is the quilt top for ruler practice, which I will call Practice Makes Perfect 2. But I had gotten sidetracked while working on Practice Makes Perfect, and started on something more interesting. 
I think I will call this Fall Frolic. It's made from the Jordan Fabrics pattern, Teatime, and it gave me the opportunity to use my Strip Tube ruler for the first time. I am actually farther along than this picture shows, needing only one more border and then it will be ready for the longarm. It will be for my nephew, Andrew. 
Back to making practice quilt tops, I got this far on Practice Makes Perfect 3 (pattern from the "Help!" class) and discovered that my HST border was too long. I've been revising the instructions as I saw fit and even though I starched the fabric before cutting HSTs, the bias still stretched. A LOT! I have some ideas for how I'm going to remedy this, but I wanted to work on something more fun for awhile. (I also made templates for the paper-piecing part - those diamonds in the centre - because I realized that I would run out of fabric if I did it all with paper-piecing). 

I had seen this video and thought that those quilts would work for baby quilts. Not that I have run out of ideas for using HSTs in baby quilts. But I certainly am not opposed to finding and trying new ideas. My local quilt shop sells precut metres of fabric for $7/metre and I resolved to give this a try. So I picked up 3 coordinating fabrics the next time I was in the shop. 
And this is what I tried next. 
This one is the Jigsaw quilt, demonstrated by Misty starting at 17:29 in the video. Full cutting directions are not provided, because, of course, they want to sell the book, which you can find here:


(And if you purchase through this link, I'll actually earn a small pittance. I have no idea how much because it's never happened so far). 
I'm going to keep this author's books in mind because I really like the idea of a 3-yard quilt and they will be great alternates for HST baby quilts. Unfortunately, I don't currently have backing fabric for this one, but that's not a big problem since I also don't have a recipient in mind. 
Meanwhile, I did a little doodling. 
This is one of the quilting designs (or at least my version of it) in the "Help!" Not bad for a non-doodler, eh? But I don't think I will ever master the serpentine lines!
October started with daily emails of quilt block designs from Moda arriving in my inbox. These are part of the #ModaStitchPink project for Breast Cancer Awareness month. I don't usually join Quilt Alongs, since I already have more than enough projects to work on. However, my oldest niece, Julie, celebrated her 50th birthday on October 11th. And her favourite colour is pink. Plus I have a sister who is a breast cancer survivor and an aunt who died at 95, who was a breast cancer survivor as well. So, I thought, "Why not?" Especially since I like trying new quilt blocks. I picked up several pink fabrics at the quilt shop, including a very pale pink solid that I'm using as the background. And I added some pink fabrics from my stash, and started making blocks. 
I think I need to move purchasing a new camera higher on my priority list. My cell phone camera just doesn't capture colours very well. 
I've only got the first two blocks done so far. As usual, I don't always follow directions exactly if I know a method that I think works better. In the above block, I used the no-waste method for making flying geese. 

I hate wasting fabric, or trying to figure out what to do with triangles that I've had to cut off corners. So, this method works really well for me. 
I told my niece that it would be a combined birthday and Christmas present and she'd probably get it closer to Christmas, but I didn't tell her that it's a quilt. I suspect that she'll probably guess. 
Well, back to the studio. In addition to these project, I've also got some more masks to make. 

Sunday, 2 August 2020

The Quick and Easy Baby Quilt

A-Maze-Ing
I think I've finally found it: the (almost) perfect formula for a quick and easy baby quilt. If you've been following my blog, then you know that I've been looking for a baby quilt pattern that works up quickly but still looks good. I thought I'd found it when I made Baby Alter Ego, but after making two of those, I was bored. (Even though they had significantly different fabrics, and I haven't even finished the first one, which exists somewhere in my stash as a UFO). I honestly don't know how people can make the same quilt pattern more than once or twice. But whether or not it's a personality flaw to get bored easily and constantly need a new challenge, that's me. And so, the search continued. I have made several baby quilts since Baby Alter Ego, most of which I was quite happy with, but none of them really fit the bill of being quick and easy. So, having 3 more baby quilts to make, I was once again perusing Jenny Doan's tutorials. And I found the Chevron quilt. 
And the Herringbone quilt, which I posted about previously. And I realized that this is basically the same quilt, just with the HSTs arranged differently. In case, you don't want to take the time to watch the video, the idea is this: take a 10" square of print and a 10" square of background, right sides together, and stitch a ¼" seam all the way around the outside. Then cut on the diagonal, corner to corner in both directions. This yields 4 HST units that are a little over 6½" square. So, I calculated how many HST units I would need for a reasonable sized baby quilt and came up with 63, 9 rows of 7 units, which produces a quilt about 44" x 55". So my fabric requirements for the Quick and Easy Baby Quilt are: 

  • 16 - 10" squares of print
  • 16 - 10" squares of background
  • 3 yards of backing fabric (approx.)
  • ½ yard binding fabric (approx.)
The main drawback to this method is that you are dealing with all bias edges on the HST units. So handle carefully to avoid distortion, maybe even starching the 10" squares before you start stitching and cutting. And you may want to add a narrow border to help prevent distortion during quilting. But I didn't, and so far I've completed 3 of them without any really significant problems. You will also end up with 1 extra HST unit, because using 16 - 10" squares produces 64, and you'll only need 63. I assume I will eventually accumulate enough orphan HSTs to make another quilt. 😉
Chevron Quilt
I quilted the Chevron quilt using Alphabet Soup #2 by Patricia Ritter from Urban Elementz. 

After completing this quilt top, I figured I would just come up with my own arrangement for the next quilt. Initially, I was going to do some kind of star arrangement, maybe with pinwheels. But then decided on something totally different and came up with A-Maze-Ing, which you can see in the picture at the top of the post. The recipient of this quilt did her nursery in blues and greys. Initially, I thought, "Oh, that will be a boring quilt." I'm big on bright, cheerful colours. But I was actually surprised by how stunning this quilt is, and it has become one of my favourite quilts. (When I posted it in a quilting group on Facebook, one quilter referred to it as a modern quilt and I thought, "Oh, I've made a modern quilt, and I actually like it.")
Then I had to pick the perfect pantograph, and chose Celtic Square by Quilting Creations from Urban Elementz.
A word about the backing - I hadn't purchased backing fabric for either of these quilts. And being in the midst of the pandemic, I didn't want to go to the fabric store, unless I really had to. I had 3 yards of an orange ombre that I considered using for the Chevron quilt, but I just didn't feel it was quite right. I have some ice cream fabric and some popsicle fabric, both of which would work for baby quilts, but I didn't consider either of them appropriate for these quilts. Then I found some fabric that was navy blue with stars and I figured that would work for both quilts, but I only had 4 yards. Doing some calculations, I cut the fabric into three lengths, stitched two seams, and was able to use it for both quilts by putting one after the other on the frame. 
Yikes! That was "backing chicken" in both length and width.  But I managed it, thank the Lord. 
Here's the actual backing fabric: 
In case you want to try my idea for the Quick and Easy Baby quilt and need some ideas for different arrangement for HST units, check out this video:

Just bear in mind that she uses a square layout with an even number of units, whereas my idea for a baby quilt is a rectangle, with an odd number of units. 
So, there you have it - a baby quilt that uses the same instructions, but can be different each time. 

Thursday, 21 May 2020

Herringbone Quilt

This is the second baby girl's quilt made with the pink print background fabric and it's based on Jenny Doan's Herringbone tutorial.
This one was made with 16 - 10" squares each of background and print and I ended up with one extra HST unit because I only needed 63. I will decide what to do with that one later. Because these units are made with diagonal cuts, the entire project is made with bias edges, not one of my favourite ideas. However, it worked out fine without even using starch. 
The prints in this one are left over from Ingrid's Tulips, plus that purple is left over from Baby Alter Ego. And I still love that pink background fabric. It gives the quilt more visual impact, in my not so humble opinion. 
I chose Briar Rose from Willow Leaf Studio as the pantograph.
I actually called this pantograph Nameless Rose. I bought it second hand and for some reason, the end with the name was cut off, so I had to look on the Willow Leaf website to see if it was theirs and what it's actual name is. Another really pretty design, but it doesn't surpass Abstract Rose from Urban Elementz in beauty. 
I have two more baby boy quilts to make and then hopefully I'll be done baby quilts for awhile. But meanwhile, I've got some masks to make.


Wednesday, 20 May 2020

Grand Adventures

My next two quilts were for baby girls, so I wanted a pink layer cake, and I didn't want to pay a whole lot of money for it. And then I thought, why couldn't I just make my own? I just had to find some pink fabric on sale (since I seldom pay full price for fabric) and buy enough to make my own layer cake. After all, I do own the Stripology ruler and I might as well put it to good use. So, on my next trip to Fabricland, I looked at pink fabric. And had to decide between a pink solid or a pink print. And since I tend to like to do things a little more radical sometimes (and I find solids boring), I chose a print. Here's the first quilt made with it. 
And making my own layer cake was quite easy with the Stripology ruler. 
Once again, this is a scaled down version of a Jenny Doan quilt, this time Grand Adventures. 
It took only 18 - 10" squares each of background and print. And this particular print is the remainder of the layer cake used in the Baby Alter Ego. I had separated it into girl's prints and boy's prints, and here is where I used the girl's prints. 
Isn't this just scrumptious? And it was a lot more fun to make than Exploring Space. No extra trimming - it just came together really easily and it looks great! I love it with that pink print for the background. 
To quilt it, I used the Flower Swirl pantograph by Urban Elementz and a pink Marathon thread. 
My Amara really likes Marathon thread.
Three more baby quilts to go. And in order to bind this one, I had to quilt the next one so that I could use scraps from that backing for this binding. And vice versa.